Complete Guide to Car Window Tinting, Repair, and Maintenance Solutions
Complete Guide to Car Window Tinting, Repair, and Maintenance Solutions
Complete Guide to Car Window Tinting, Repair, and Maintenance Solutions
Replace your windshield as soon as next day at your home, work or your preferred location.
By submitting this form you are agreeing to receive SMS and phone call updates on your windshield replacement and at anytime can opt out by replying "STOP".
Replace your windshield as soon as next day at your home, work or your preferred location.
By submitting this form you are agreeing to receive SMS and phone call updates on your windshield replacement and at anytime can opt out by replying "STOP".
By submitting this form you are agreeing to receive SMS and phone call updates on your windshield replacement and at anytime can opt out by replying "STOP".
By submitting this form you are agreeing to receive SMS and phone call updates on your windshield replacement and at anytime can opt out by replying "STOP".
How to Remove Water Spots from Car Glass
Water spots on your car’s windows and windshield are caused by minerals left behind after water evaporates. These minerals, usually calcium and magnesium, stick to the glass and become more difficult to remove over time. Left untreated, they can cause permanent etching, reduce visibility, and make your vehicle look neglected. To remove water spots from car glass, begin with a 50/50 mixture of white vinegar and distilled water. Spray it generously on the affected areas and let it sit for about five minutes. The vinegar breaks down the mineral deposits, making them easier to wipe away. After soaking, use a clean microfiber towel to gently scrub the glass in circular motions. For more stubborn spots, a dedicated water spot remover can provide stronger cleaning power. Alternatively, a detailing clay bar paired with clay lubricant can remove mineral deposits embedded in the surface. Always dry your windows completely with a soft towel to prevent new spots from forming. If your car is regularly exposed to sprinklers or hard water, consider applying a water repellent product like Rain-X to your glass after cleaning. This creates a hydrophobic layer that reduces future water adhesion. Regularly washing your car in the shade, using filtered water, and drying with a soft towel also helps prevent water spots. In extreme cases where water spots have etched into the glass, professional polishing or replacement may be required. Keeping your windows clean is about more than just appearance—it ensures clear visibility, supports safe driving, and protects your investment. Incorporate water spot removal into your monthly maintenance routine to keep your car looking sharp and your windows perfectly clear.
How to Remove Windshield and Car Window Tint
Removing tint from your windshield or windows can be necessary when the film becomes discolored, bubbles, or no longer complies with local tint laws. If you're wondering how to remove windshield tint or tint from car windows, the process requires a mix of patience and the right tools. First, apply heat to the glass using a hairdryer or heat gun. Warm the tint film by holding the heat source a few inches from the surface and moving it around slowly. Once the adhesive softens, begin peeling from one corner, using your fingers or a plastic razor blade to lift the edge. Continue applying heat as you peel to prevent tearing the film. After removing the film, you're likely to find leftover adhesive residue. To remove it, spray the area with rubbing alcohol, ammonia, or a commercial tint adhesive remover. Allow the solution to sit for several minutes to loosen the glue. Use a plastic scraper or microfiber cloth to wipe it away carefully. Avoid using metal scrapers as they can scratch the glass or damage embedded defroster lines. For particularly stubborn adhesive, multiple applications may be needed. Once clean, wash the glass with an automotive glass cleaner to ensure no residue remains. If the tint was covering a windshield with a heads-up display or camera sensors, take extra care not to damage these systems. Proper removal of window tint restores original visibility and prepares your windows for a new film installation or simply keeps them factory clear. Whether you're changing the look, upgrading your film, or staying compliant with the law, removing tint the right way helps preserve both safety and aesthetics.
How to Remove Old Window Tint and Tint Residue
When window tint starts to peel, bubble, or discolor, it not only looks bad but can also impair your visibility. Removing old window tint is a bit more time-consuming than fresh film, especially if it's been baked on by years of sun exposure. To remove old window tint, start by softening the adhesive. Spray a mixture of ammonia and water on the inside of the window, then cover it with plastic wrap to trap the moisture and allow the solution to soak in. Place the vehicle in the sun to help accelerate the process. After 30–60 minutes, begin peeling from a corner. For stubborn areas, use a heat gun or hairdryer to further loosen the adhesive. Be sure to go slow to avoid tearing the film into smaller pieces. Once the tint film is removed, adhesive residue is typically left behind. Use a commercial adhesive remover, rubbing alcohol, or a vinegar-water mixture to break down the glue. Apply your solution and let it soak for several minutes, then gently scrape with a plastic blade or wipe with a microfiber cloth. Repeat the process as needed until the glass is completely clean. For edges and corners, a cotton swab can help reach tight spots. Once you're done, wash the windows thoroughly with glass cleaner. Removing old tint restores your car's appearance, enhances visibility, and allows you to reapply new tint cleanly. Keep in mind that older tint might be more brittle, making the job more tedious. However, taking your time and using the right products will ensure a smooth removal process and leave your windows looking brand new.
How to Repair a Windshield
Windshield repair is crucial when it comes to keeping your vehicle safe and functional. Small chips and cracks can spread quickly due to vibrations, weather changes, and road impact. If you're wondering how to repair a windshield, it’s often possible to handle minor damage yourself with a repair kit. These kits typically include a resin compound, an injector tool, and a curing strip. First, clean the damaged area with glass cleaner and let it dry completely. Position the injector tool over the chip or crack and apply the resin according to the instructions. The resin fills the void and hardens under UV light, which you can provide with the sun or a UV lamp. Once the resin has cured, scrape off any excess and polish the area to restore clarity. Windshield repair kits work best for chips smaller than a quarter or cracks under three inches long. If the damage is located in the driver’s direct line of sight, near the edge of the windshield, or larger than the repair guidelines, a full replacement is usually recommended. Larger damage can compromise the structural integrity of the windshield and reduce your vehicle’s crash protection. Many insurance companies will cover windshield repair at no cost, especially in states with zero-deductible laws for auto glass. Regularly inspect your windshield and address any damage promptly. Catching small issues early not only saves money but also prevents safety hazards down the line. Windshield repair is a simple yet effective part of vehicle maintenance that every driver should be prepared to perform or schedule as needed.
How to Repair a Chipped Windshield
A small chip in your windshield may seem harmless, but left untreated, it can expand into a full-blown crack. Learning how to repair a chipped windshield promptly can save you time, money, and the need for full glass replacement. Start by examining the chip. If it's smaller than a quarter and not in the driver's direct line of sight, it's typically repairable. Clean the area with glass cleaner and allow it to dry completely. Use a windshield chip repair kit, which includes resin and an application tool. Follow the kit's instructions to apply the resin, which is designed to bond the glass together and restore structural integrity. After applying, cover the area with the curing strip provided and place the car in sunlight or use a UV light to harden the resin. Once cured, scrape off any excess resin and polish the surface. The result should be a smooth, sealed chip that’s much less visible and won’t spread under temperature or pressure changes. While DIY kits are effective for small chips, professional services offer more advanced tools and better results for irregular or deeper chips. Technicians can assess whether repair is viable or if full replacement is safer. If the chip is near the edge or affects embedded sensors or HUD features, a professional should handle the job. Delaying chip repair allows dirt and moisture to penetrate the crack, making future repairs less effective. Address chips immediately, especially during winter or summer months when glass expands and contracts more rapidly. Regular inspections and quick action are essential parts of effective windshield maintenance.
Replacement Glass for Auto Windows
When damage to your car’s windows goes beyond repair, it’s time to consider replacement glass. Whether you need a new windshield, door window, or rear glass, selecting the right type of replacement is crucial. Replacement glass for auto windows generally falls into two categories: OEM (original equipment manufacturer) and aftermarket. OEM glass matches your vehicle’s original specifications, ensuring the best fit and compatibility with safety systems like rain sensors, defrost lines, lane-keeping cameras, or HUD projectors. Aftermarket glass is often cheaper, but it may not align perfectly with your car’s technology or aesthetic. Before installation, confirm whether your vehicle requires recalibration for systems like forward-collision warning or adaptive cruise control. Many modern cars integrate cameras and sensors into their glass, making correct installation essential for safety and function. A reputable shop should include recalibration as part of the service if needed. Replacing side windows or quarter glass typically doesn't involve sensor recalibration, but it’s still important to use tempered glass for strength and shatter protection. Rear window replacements must support embedded heating elements, antennas, or rear wipers, depending on your vehicle model. Always ask whether the replacement glass is certified and meets federal safety standards. Also check if your insurance policy covers replacement costs under comprehensive coverage. When scheduling service, inquire about mobile repair options and warranty details. Professional installation is key to ensuring proper sealing, preventing leaks, and maintaining the integrity of your car’s safety structure. Quality glass, correctly installed, keeps your car roadworthy, quiet, and weatherproof. Choosing the right replacement glass helps retain value, function, and appearance—so don’t cut corners.
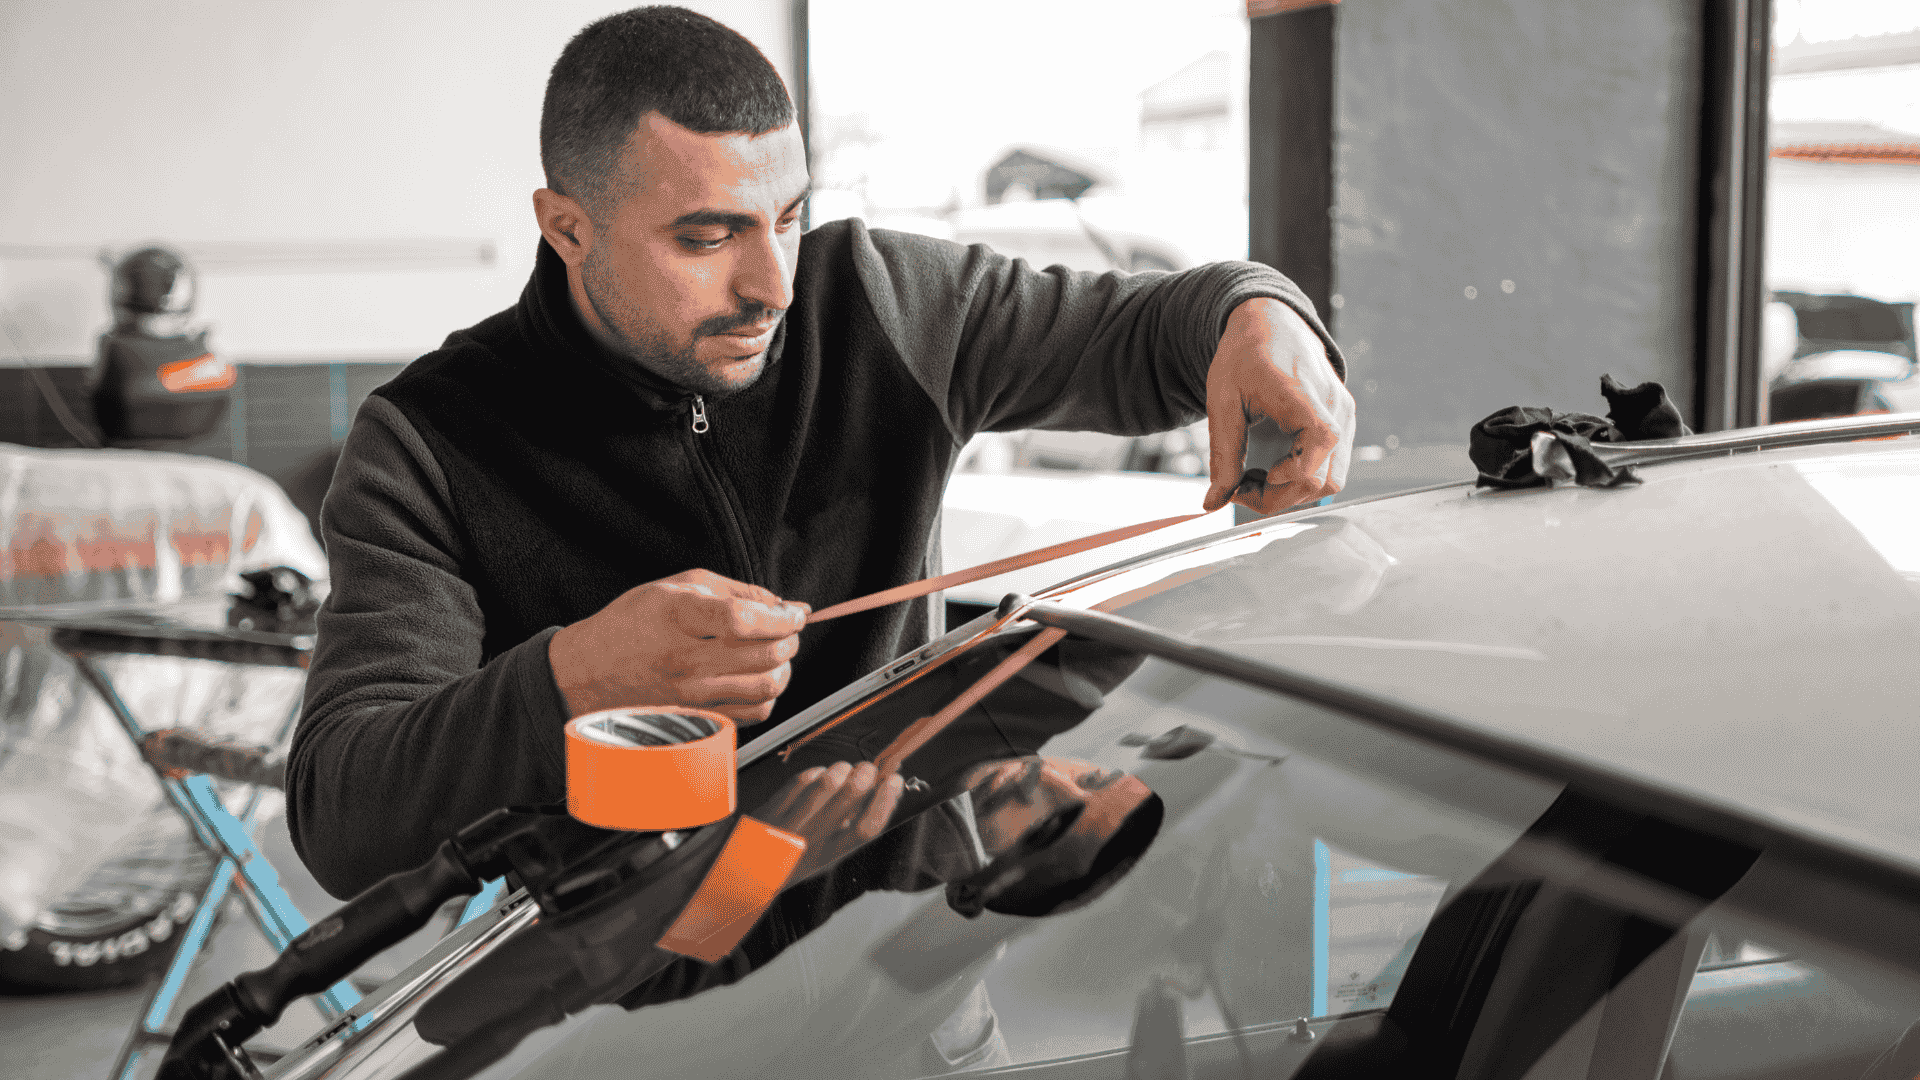
How to Replace Front Window and Windshield
Replacing a damaged front window or windshield is more than just a cosmetic fix—it’s a safety-critical repair that supports your vehicle’s structural integrity and airbag functionality. To begin the replacement process, a professional technician will remove any trim, moldings, and wiper arms obstructing the glass. Specialized tools are used to cut away the adhesive holding the old windshield in place. Once the old glass is removed, the area must be cleaned thoroughly and prepped with primer to ensure a solid bond. A fresh bead of automotive urethane adhesive is then applied, and the new windshield is carefully set into position using suction cups or mounting brackets. It’s important that the new windshield is perfectly aligned to avoid leaks and stress points. After installation, the adhesive requires curing time—often one to two hours—during which the vehicle must remain stationary. Some installations also involve recalibrating cameras and sensors linked to ADAS (advanced driver-assistance systems), such as lane-departure warnings and rain-sensing wipers. Ask your shop if calibration is included in the service and whether they use OEM glass, which ensures the best fit and compatibility. Replacing side windows, though simpler, also requires professional handling. The inner door panel is removed, the broken glass is cleared, and the new panel is fitted onto the regulator and tracks. Proper sealing and alignment are vital to prevent rattles, leaks, or glass wear. Replacing auto glass ensures your car remains safe, functional, and up to legal and manufacturer standards. While some services offer mobile replacement, always confirm the quality and certification of their materials and technicians.
How to Replace Windshield and Windshield Quote
Getting your windshield replaced is an important investment in both your safety and vehicle maintenance. If you're wondering how to replace windshield glass, the process involves removing the old pane, prepping the bonding surface, and installing a new windshield with industry-grade adhesive. To get started, contact several local auto glass providers for a windshield quote. A quote should include the cost of the glass itself, labor, adhesive, and any necessary calibration for cameras and sensors. Be sure to ask whether the quote includes OEM or aftermarket glass, as this will affect both price and compatibility. Most modern vehicles require windshield calibration to ensure proper function of ADAS features like automatic emergency braking, lane-keeping assist, or heads-up displays. If not properly recalibrated, these systems may malfunction or give false alerts. Recalibration is often an additional service and can cost between $100 and $250. A typical windshield replacement without advanced features can cost between $200 and $500, while high-tech windshields can cost over $1,000. Insurance may cover the cost if you have comprehensive coverage—some states even require insurers to replace windshields at no cost to the policyholder. Always confirm your deductible and coverage before scheduling the service. The installation process usually takes 1–2 hours, and your vehicle may need to sit afterward to allow the adhesive to fully cure. Don’t drive until the technician gives the all-clear. Investing in proper windshield replacement not only restores visibility but also ensures that your vehicle remains safe, legally compliant, and structurally sound.
How to Remove Vinyl Stickers from Car
Vinyl stickers are commonly used for branding, decoration, or temporary messages on vehicles, but they can become difficult to remove after sun exposure and aging. To begin the process, heat the vinyl sticker with a hairdryer or heat gun set to medium. This softens the adhesive, making it easier to peel off without tearing. Start at one corner and peel slowly at a low angle to minimize glue residue. If the vinyl rips, apply more heat and continue working section by section. Once the sticker is off, you’ll likely find adhesive left behind. Use a commercial adhesive remover, rubbing alcohol, or citrus-based cleaner to dissolve the glue. Apply the solution and let it sit for a few minutes before gently scrubbing with a microfiber towel or plastic scraper. Avoid using metal blades that can damage paint or scratch the glass. After the adhesive is removed, wash the area with soapy water to neutralize any leftover chemicals. On painted surfaces, consider polishing or waxing the cleaned area to restore shine and protect the finish. Removing vinyl stickers takes time and patience, but doing it correctly ensures you won’t damage the paint, glass, or window trim. Whether you’re selling the vehicle, removing old decals, or just refreshing the appearance, following the right steps will leave your car clean and residue-free.
How to Remove Window Tint Residue
After removing window tint film, leftover adhesive can be a sticky mess that clouds your visibility and ruins the clean look of your glass. If you're wondering how to remove window tint residue, the process starts with selecting the right cleaner. Ammonia-based cleaners, vinegar-water mixtures, or commercial adhesive removers are all effective. Spray the solution generously on the residue and let it soak for at least five minutes to soften the glue. Next, use a plastic scraper or an old credit card wrapped in a cloth to gently scrub off the softened adhesive. Avoid using metal tools that can scratch the glass or damage defroster lines. For stubborn residue, repeat the soaking and scrubbing process until the glass is completely clean. Pay special attention to the edges and corners, where adhesive often accumulates. Once the residue is gone, wash the glass with a high-quality automotive glass cleaner and a microfiber towel for a streak-free finish. Removing tint residue is essential before reapplying new tint or simply restoring factory clarity. If your tint was applied on rear windows with embedded defroster lines, be extra cautious not to scrape too hard or damage the electrical elements. For large or extremely stubborn jobs, consider hiring a professional who has the tools and expertise to clean the surface thoroughly and safely. Removing window tint residue properly leaves your glass clear, smooth, and ready for whatever comes next—whether that’s a new layer of tint or just a clean, polished finish.

