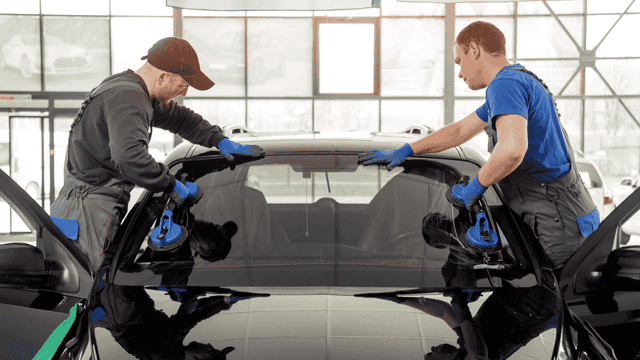
How to Handle Windshield Replacement, Auto Glass Repair, and Window Tinting
How to Handle Windshield Replacement, Auto Glass Repair, and Window Tinting
How to Handle Windshield Replacement, Auto Glass Repair, and Window Tinting
Replace your windshield as soon as next day at your home, work or your preferred location.
By submitting this form you are agreeing to receive SMS and phone call updates on your windshield replacement and at anytime can opt out by replying "STOP".
Replace your windshield as soon as next day at your home, work or your preferred location.
By submitting this form you are agreeing to receive SMS and phone call updates on your windshield replacement and at anytime can opt out by replying "STOP".
By submitting this form you are agreeing to receive SMS and phone call updates on your windshield replacement and at anytime can opt out by replying "STOP".
By submitting this form you are agreeing to receive SMS and phone call updates on your windshield replacement and at anytime can opt out by replying "STOP".
How to Replace a Broken Window Regulator.
Replacing a broken window regulator is a necessary repair when your car window no longer moves smoothly or becomes stuck. The regulator is the mechanical assembly that connects your window motor to the glass and controls its movement up and down. If you're planning to replace a broken window regulator, start by disconnecting the vehicle’s battery to prevent electrical shock or short circuits. Remove the interior door panel by unscrewing fasteners and carefully prying off clips and trim pieces using a trim tool. Once inside, locate the window regulator and its connection to the window glass. Detach the glass carefully by loosening the bolts or clips that secure it to the regulator, then raise the window manually and tape it in place if needed. Next, remove the old regulator and window motor, usually secured with bolts or rivets. Once removed, install the new regulator by aligning it with the mounting holes and securing it tightly. Reconnect the motor wiring, test the window’s movement using the switch, and ensure it operates smoothly before reassembling the door panel. If you're unfamiliar with door panel components or electrical systems, this task is best handled by a professional mechanic or auto glass technician. Prompt replacement of a faulty regulator restores proper window function, ensures security, and prevents further electrical strain on your vehicle.
How to Fix a Broken Car Window.
A broken car window not only affects your vehicle’s appearance and comfort but also leaves it vulnerable to theft and weather damage. Fixing a broken car window requires careful handling, especially if there's shattered glass involved. Start by wearing protective gloves and removing any remaining glass from the window frame and surrounding areas. Use a vacuum cleaner to clear out glass from the seats, floor, and door cavity. Once the area is clean, remove any weatherstripping or trim that may be in the way. If the window operates on a manual or power regulator, you'll need to access it by removing the door panel. Carefully slide the replacement glass into the window track, making sure it’s aligned properly. Secure it with the mounting hardware provided, which may include bolts, clips, or adhesive depending on the vehicle model. Test the window’s movement before reinstalling the door panel and weatherstripping. If the window is part of a sealed system or includes features like defrosters or antennas, you may need professional installation to ensure all systems work properly. A properly installed window restores your vehicle’s safety, keeps moisture out, and maintains cabin comfort during all seasons.
How to Fix a Car Window Wiper Blade.
Windshield wiper blades are essential for clear visibility during rain, snow, or road spray. When wipers begin to streak, squeak, or miss spots, it's time to inspect or replace them. To fix a car window wiper blade, start by lifting the wiper arm away from the windshield and examining the rubber edge for cracks, warping, or detachment. If the rubber is damaged or missing sections, replacement is necessary. Press the release tab or slide button on the wiper blade to remove it from the wiper arm. Install the new blade by aligning it with the arm’s connector and pressing until it clicks into place. Gently lower the arm back onto the glass. If your wiper blades are relatively new but still performing poorly, clean them with a soft cloth and rubbing alcohol to remove road grime or oily residue. Also clean the windshield to ensure dirt isn’t causing friction. For vehicles with rear window wipers or beam-style blades, follow specific instructions from your vehicle’s manual to ensure correct fitment. Replacing or cleaning wiper blades every six months ensures optimal performance and clear visibility in all driving conditions.
How to Fix a Car Window That Won’t Roll Up.
A car window that won’t roll up is more than an inconvenience—it’s a potential security and weather hazard. When troubleshooting this issue, begin with the simplest solution: test the window switch. Try both the individual door switch and the driver’s master control. If neither works, check your car’s fuse box for a blown fuse related to power windows. Replace the fuse if needed and test the switch again. If the fuse is fine but the window still won’t move, the problem may be with the window motor or regulator. Remove the door panel carefully and check for audible signs when you press the switch—if you hear a motor running but the window doesn’t move, the regulator may be off-track or broken. If there’s no sound at all, the motor could be dead and require replacement. Some issues also stem from worn or disconnected wiring between the switch and the motor. Use a multimeter to test voltage and ensure power is reaching the motor. If the switch, fuse, and motor all seem functional, the window glass may be jammed in the track. Gently push or pull the window while pressing the switch to see if it frees itself. If none of these steps solve the issue, a mechanic can diagnose further using OEM tools and diagrams.
How to Fix a Car Window That Squeaks When Rolling Down.
A squeaky car window is usually caused by dirt, debris, or friction in the window track or regulator system. Fixing this issue involves inspecting the window tracks and seals to remove obstructions and applying lubricant to reduce friction. Begin by lowering the window halfway to access the tracks. Use a soft brush or cloth to clean out any dirt, dust, or buildup inside the tracks. After cleaning, apply a silicone-based lubricant along the edges of the window channels—this type of lubricant is safe for rubber and plastic and doesn’t attract dust like oil-based greases. Roll the window up and down several times to distribute the lubricant evenly throughout the track. Avoid using petroleum-based products as they can degrade the rubber seals over time. If the squeaking continues, remove the interior door panel to inspect the regulator and track for signs of wear, misalignment, or metal-on-metal contact. A bent regulator arm or loose hardware may be causing the noise and may require tightening or replacement. Keeping the window tracks clean and lubricated not only eliminates annoying squeaks but also reduces strain on the window motor and extends the life of the regulator assembly.
How to Remove Water from Car Windows.
Water spots on car windows are often caused by mineral deposits left behind when water evaporates, especially if you live in an area with hard water. These spots not only affect the appearance of your vehicle but can also impair visibility if left untreated. To remove water spots from car windows, start by washing the windows with a mild soap and water solution to eliminate surface dirt and grime. After rinsing, create a 50/50 mixture of white vinegar and distilled water and apply it to the affected areas using a spray bottle. Allow the solution to sit for a few minutes to break down the mineral buildup. Then, wipe the area with a microfiber cloth using circular motions. For tougher stains, you can use a clay bar or a commercial water spot remover designed specifically for auto glass. After removing the spots, rinse the window again and dry it with a clean, lint-free towel to prevent new spots from forming. Applying a glass sealant or rain repellent product can help reduce future buildup by creating a barrier that water can’t easily stick to. Regular cleaning and protection are key to maintaining crystal-clear windows in all weather.
How to Clean Car Window Wiper Blades.
Cleaning your wiper blades is a simple but essential part of vehicle maintenance that helps ensure optimal visibility during adverse weather. If you’re wondering how to clean car window wiper blades, start by lifting the wiper arms away from the windshield to allow easier access. Dampen a microfiber cloth with warm soapy water and wipe along the length of the rubber blade to remove any accumulated dirt, road grime, or debris. For more thorough cleaning, use a cloth soaked in rubbing alcohol to cut through grease or residue buildup. Be gentle to avoid damaging the rubber. After cleaning the blades, also wipe down the area of the windshield where the blades make contact to prevent recontamination. Regularly cleaning your wiper blades helps prolong their life, improves performance, and prevents streaking that can reduce visibility. If the blades are still leaving streaks or making noise after cleaning, inspect the rubber for signs of wear or tearing—if damaged, it’s time to replace them. Clean blades paired with a clean windshield make for safer, clearer driving in rain, snow, or road spray.
How to Repair Car Windshield Chips.
Chips in your windshield are common and usually caused by rocks or debris hitting the glass while driving. These small damages can quickly develop into long cracks if not addressed. To repair car windshield chips, start by assessing the size and location of the chip. If it’s smaller than a quarter and not directly in the driver’s line of sight, you can likely repair it using a DIY windshield repair kit. Clean the chipped area with glass cleaner and allow it to dry completely. Attach the included suction mount and apply the resin into the chip using the applicator tool. Let the resin cure under UV light or sunlight for 10–15 minutes, then scrape off any excess and polish the surface. The repair should stop the chip from spreading and restore some clarity to the glass. If the chip is larger or has begun to crack, it’s best to seek professional help. Many insurance companies cover chip repairs with no deductible, especially if done promptly. Fixing a chip as soon as possible helps preserve the integrity of your windshield and avoids more costly replacements down the line.
How to Repair Car Windshield Scratches.
Scratches on your car’s windshield can be distracting and, if deep enough, impair visibility. Light scratches can often be removed at home, while deeper ones may require professional attention or glass replacement. To repair car windshield scratches, start by cleaning the windshield thoroughly with glass cleaner to remove dust and debris. For light surface scratches, apply a small amount of cerium oxide polish (included in most glass polishing kits) to the affected area. Use a polishing pad or microfiber cloth to gently buff the scratch using firm, circular motions. Work slowly and reapply as needed until the scratch fades. Wipe away the polish and inspect the glass under different lighting to check your progress. If the scratch catches your fingernail, it may be too deep for polishing and should be evaluated by a professional auto glass technician. Prevent future scratches by regularly cleaning your windshield and replacing worn wiper blades, which can drag grit across the glass and cause damage. Using proper cleaning materials and methods will help maintain a clear, unmarred windshield and improve overall safety.
How to Remove Car Windshield Protection Film.
Windshield protection film is designed to shield your glass from chips, scratches, and UV rays, but over time, it may peel, discolor, or wear out. If you're wondering how to remove car windshield protection film, the process begins with softening the adhesive. Use a hairdryer or heat gun on a low setting to warm up the film across a small area. Once the film is warm, start at one corner and slowly peel it back at a low angle. Take your time to avoid tearing or leaving behind film fragments. If any sections resist, reheat them gently before peeling. Once the film is fully removed, you’ll likely have adhesive residue left on the glass. Spray the area with an automotive adhesive remover or a vinegar-based solution and let it soak for several minutes. Use a microfiber cloth or plastic scraper to remove the residue, then clean the windshield thoroughly with glass cleaner to restore full clarity. For best results, perform this task in a shaded or indoor area to avoid the adhesive setting too quickly in heat. Removing old film properly preps the glass for a new application or just gives you a fresh, clear view of the road ahead.

