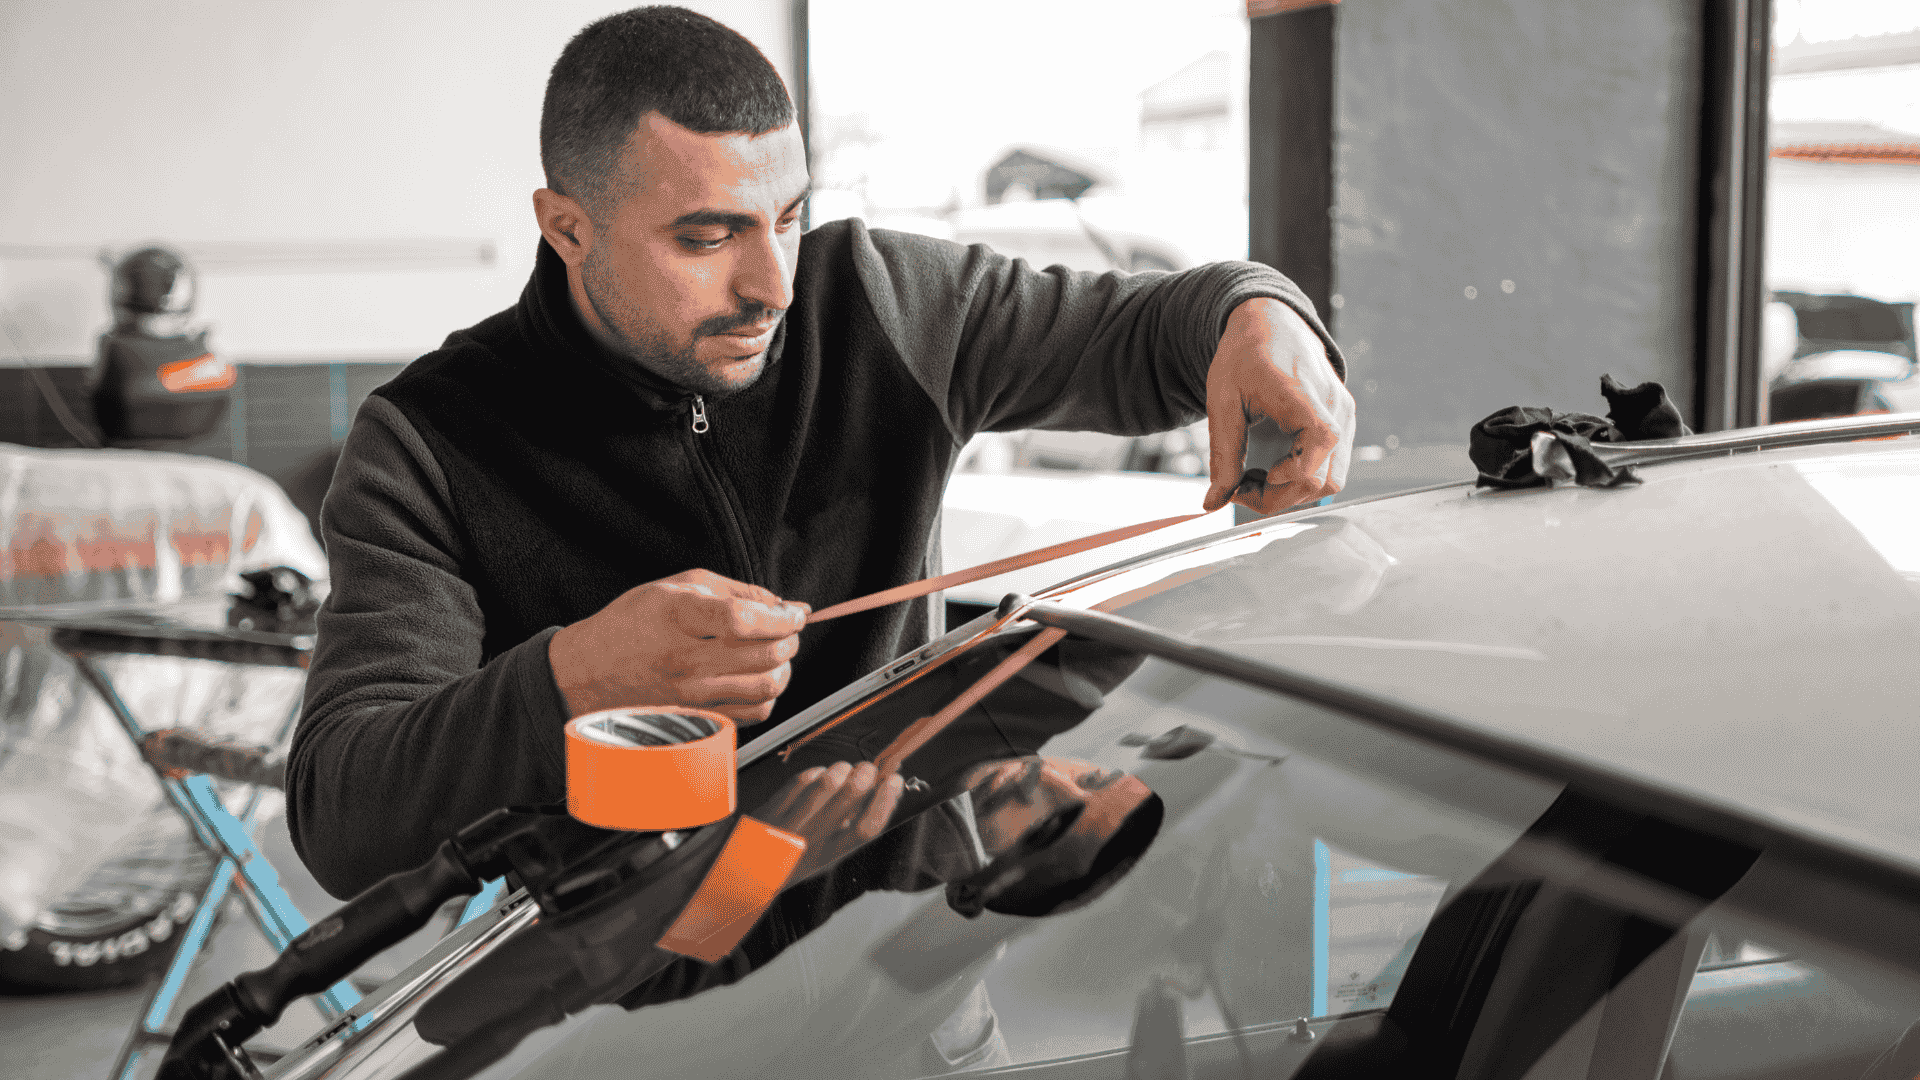
Rock Chip Repair And ADAS Calibration Essentials
Rock Chip Repair And ADAS Calibration Essentials
Rock Chip Repair And ADAS Calibration Essentials
Replace your windshield as soon as next day at your home, work or your preferred location.
By submitting this form you are agreeing to receive SMS and phone call updates on your windshield replacement and at anytime can opt out by replying "STOP".
Replace your windshield as soon as next day at your home, work or your preferred location.
By submitting this form you are agreeing to receive SMS and phone call updates on your windshield replacement and at anytime can opt out by replying "STOP".
By submitting this form you are agreeing to receive SMS and phone call updates on your windshield replacement and at anytime can opt out by replying "STOP".
By submitting this form you are agreeing to receive SMS and phone call updates on your windshield replacement and at anytime can opt out by replying "STOP".
How To Remove Rock Chip From Windshield
A rock chip on your windshield is a common form of damage that can be repaired before it turns into a crack. If you're wondering how to remove a rock chip from your windshield, the first step is to clean the area around the chip to remove dirt and debris that could affect the repair. Then, use a windshield repair kit that includes resin designed specifically for auto glass. Apply the resin carefully by following the instructions, ensuring the chip is completely filled and sealed. Let the resin cure under UV light or natural sunlight before removing any excess, and always inspect the area afterward to make sure the damage is no longer spreading. Applying a clear curing strip over the repair can help hold the resin in place while curing, giving the best results. Regular inspection of previous chip repairs is also a good practice, especially after temperature fluctuations or long drives, as changes in stress could reopen sealed areas. Prevention is another key—keeping a safe distance from large trucks and avoiding gravel roads can help you avoid rock chips altogether. Keeping a repair kit in your vehicle can help you address small chips quickly before they worsen. Lastly, always perform chip repairs in a shaded, dry location to ensure the resin bonds properly and visibility is fully restored.
How To Repair Windshield Chip From Rock
Repairing a windshield chip from a rock is a straightforward process when done early and correctly. If you're asking how to repair a windshield chip from a rock, start by thoroughly cleaning the chip with a glass-safe cleaner to remove any dust, oil, or debris. Use a repair kit with resin to fill the chip, carefully injecting it into the center of the damage and allowing it to spread evenly throughout the crack. Cure the resin with UV light or sunlight to harden the material and seal the chip effectively. After curing, scrape off any leftover resin using a razor blade and polish the area to restore visibility and clarity. A properly repaired chip will be nearly invisible and restore the windshield’s structural strength, preventing the crack from spreading further. If the chip shows signs of spidering or if moisture has already seeped into the damaged area, it may not be suitable for repair, and full windshield replacement might be necessary. Be cautious about DIY repairs if the chip is in the driver’s line of sight—any distortion can be a safety hazard. Professional inspection is always recommended for larger chips or if the crack is near the windshield’s edge, as that can compromise the vehicle's structural integrity. Timely intervention and proper application of resin ensure that minor damage doesn’t escalate into a major repair cost.
How To Replace Windshield On Buick Lacrosse
Replacing the windshield on a Buick Lacrosse should always be done using OEM-quality glass and by a professional technician. If you're wondering how to replace the windshield on a Buick Lacrosse, a qualified shop will begin by removing the wiper blades and exterior trim, then carefully cut away the adhesive that secures the old windshield. Once the damaged glass is removed, the frame is cleaned and a fresh bead of urethane adhesive is applied. The new windshield is placed and properly aligned, with time given for the adhesive to cure before driving. Choosing a reputable installer ensures a safe, leak-free, and secure windshield replacement every time. OEM windshields match the original specifications, ensuring compatibility with built-in features such as rain sensors, heads-up displays, and lane departure systems. After installation, ADAS recalibration may be required to ensure the vehicle’s safety systems function correctly. Many service centers offer on-site calibration, reducing the need for additional appointments. Always verify that your provider uses certified adhesives and follows factory torque specifications on trim reassembly. Proper replacement not only restores structural integrity but also prevents water intrusion and air leaks that can degrade driving comfort and cabin safety. Neglecting correct procedures can result in costly future issues such as rust around the frame or malfunctioning sensors, so quality workmanship is non-negotiable.
How To Repair Acura MDX Windshield
Repairing an Acura MDX windshield depends on the severity and location of the damage. If you're asking how to repair an Acura MDX windshield, small chips and cracks that do not obstruct the driver’s vision can often be fixed using a professional-grade repair kit. Clean the area thoroughly, apply resin into the chip or crack, and allow it to cure with UV light to prevent the damage from expanding. For damage that is larger or affects embedded technology such as rain sensors or ADAS, full replacement may be required. Always consult with a certified technician to ensure repairs meet safety standards and maintain vehicle integrity. Many Acura MDX models come equipped with cameras behind the windshield for lane-keeping and adaptive cruise control—these must be recalibrated after any glass service. A misaligned camera could delay braking response or misinterpret road markings. Certified Acura dealers or specialized auto glass shops with ADAS-capable equipment are the safest option for maintaining system integrity. Also, be cautious with aftermarket glass, which might not have the exact tint gradient or sensor cutout design. Quality resin, correct curing temperature, and post-repair inspection are critical to maintaining both aesthetics and functionality. Ignoring windshield damage, no matter how minor, can risk further cracking, especially under weather stress or impact from road debris.
How To Get Affordable Window Tinting In Tucson Arizona
Finding affordable window tinting in Tucson, Arizona, involves comparing local auto shops and checking customer reviews for quality and pricing. If you're wondering how to get affordable window tinting in Tucson, Arizona, look for shops that offer seasonal promotions or bundle deals with other services like detailing. Be sure the tint complies with Arizona laws regarding visible light transmission and reflectivity. Request quotes from at least three different shops and ask about warranty coverage for peeling, fading, or bubbling. Opting for quality film at a competitive price ensures durability and legal compliance in Arizona’s sunny climate. Tucson’s intense UV exposure makes tint not just a style choice but a health and maintenance investment—proper tinting helps reduce glare, lower interior temperatures, and protect upholstery. While budget options exist, avoid extremely low-cost jobs that may use poor adhesive or substandard film, leading to hazing and cracking within a few months. Ask whether the shop uses ceramic, dyed, or carbon film and weigh the pros and cons of each. Higher-end films offer better UV protection and last significantly longer. Also, confirm if the shop is licensed and compliant with state regulations to avoid costly rework or citations. A solid tint job improves not just aesthetics but also driving comfort and long-term vehicle care.
How To Perform ADAS Calibration Accurately After Windshield Work
ADAS calibration must be completed with precision to ensure that the vehicle’s safety systems operate as designed. The process begins with identifying the specific ADAS features present in the car, which might include lane departure warning, adaptive cruise control, or forward collision alert. Once the windshield has been replaced or sensor components have been altered, the technician must conduct either a static calibration or a dynamic calibration, depending on the vehicle manufacturer’s instructions. Static calibration is performed indoors using specially aligned targets and sensor testing equipment to calibrate cameras and radar while the vehicle remains stationary. Dynamic calibration, on the other hand, requires the vehicle to be driven on roads while the sensors are adjusted in real-time based on speed and distance parameters. Both methods rely on high-precision diagnostic tools that meet OEM specifications. Failure to properly calibrate ADAS systems after windshield replacement or sensor realignment can cause serious safety issues, such as false alerts or the complete failure of critical features. Technicians must also perform a post-calibration scan to verify that all sensors, cameras, and modules are correctly synchronized. Calibration should always be documented thoroughly to meet warranty and insurance standards. Vehicles with advanced ADAS systems may even require a combination of both calibration methods, adding to the complexity and underscoring the importance of using a certified service center with specialized training. Without professional ADAS calibration after auto glass service, drivers risk losing the reliability and protective functionality of their modern driver assistance technology.
How To Get ADAS Certification As An Auto Glass Technician
ADAS certification is an essential credential for auto glass technicians seeking to expand their skills and service offerings in the modern automotive market. With more vehicles integrating advanced driver-assistance systems, certified training ensures that technicians are equipped to handle the calibration and replacement of sensitive sensors and cameras. To get ADAS certification, begin by researching accredited programs offered by OEMs, industry-recognized training centers, or professional associations such as the Auto Glass Safety Council or the National Institute for Automotive Service Excellence (ASE). These courses cover a combination of classroom instruction and hands-on practice using real calibration equipment. Topics include sensor theory, calibration procedures, windshield glass specifications, radar and camera alignment, and diagnostic scanning. Courses can often be completed in a few days or over several weeks, depending on the depth of the program. After completing the training, technicians must pass a written and sometimes practical exam to demonstrate proficiency. Certification is not only a mark of expertise but also a requirement for shops looking to work with insurance networks or meet dealership service standards. Ongoing education is also important, as ADAS technology continues to evolve. Technicians who maintain their certifications by participating in updates and refresher courses remain competitive and capable of servicing the latest vehicles. Investing in ADAS certification not only improves technical knowledge but also enhances business credibility, customer trust, and long-term service quality in an increasingly technology-driven auto glass industry.
How To Fix ADAS Sensor Alignment Issues After Glass Damage
Fixing ADAS sensor alignment issues is critical after a windshield replacement or any incident that could shift the sensor’s position, such as a collision or improper installation. These sensors play a vital role in safety functions, including emergency braking, adaptive cruise control, and lane-keeping assistance. If alignment is off, these systems may not function correctly or could provide inaccurate warnings, increasing the risk of accidents. To fix ADAS sensor alignment issues, begin with a full scan of the vehicle’s diagnostic system using manufacturer-approved software to determine which sensors are out of calibration. Once identified, the next step involves performing the appropriate calibration method—static, dynamic, or dual. Static calibration requires positioning the vehicle in a controlled indoor environment with laser or camera-based equipment that aligns the sensors using manufacturer-specific targets. For dynamic calibration, the vehicle is driven under precise conditions while the system recalibrates based on environmental input. In many modern cars, cameras mounted behind the windshield must also be recalibrated following glass replacement to maintain accurate road scanning capabilities. If sensors are loose, damaged, or misaligned due to poor installation, adjustments or replacements may be necessary before calibration. After the alignment is completed, a final scan should be conducted to verify that all systems are functioning properly. Maintaining correct sensor alignment ensures that ADAS features continue to provide the safety advantages they were designed for and helps maintain compliance with vehicle manufacturer specifications and insurance coverage standards.
How To Replace ADAS Components Safely And Accurately
Replacing ADAS components such as radar sensors, cameras, and ultrasonic modules requires great care and adherence to OEM procedures. These components are highly sensitive and essential to a vehicle’s safety system, meaning that even a small misalignment can lead to feature failure or reduced effectiveness. To replace ADAS components safely, first disconnect the vehicle battery to prevent electrical issues or software faults. Carefully remove the defective component using appropriate tools, making sure not to damage surrounding parts or wiring. Install the new component in the exact position as the original, ensuring that all connectors and fasteners are secure. Use torque specifications if provided by the manufacturer to avoid overtightening. After installation, perform the required calibration procedure, which may involve static calibration in a shop setting or dynamic calibration on the road, depending on the specific system involved. Diagnostic tools must be used throughout the process to monitor system responses and ensure proper communication between the new component and the vehicle’s onboard computer. If components such as a forward-facing camera or radar sensor are mounted behind or within the windshield, replacing the windshield itself may be necessary to complete the job correctly. Always use OEM or OEM-equivalent components for replacements, as aftermarket parts may not meet calibration tolerances. Document the installation and calibration thoroughly for warranty and insurance purposes. Proper replacement and calibration of ADAS components protect both the vehicle’s integrity and the driver’s safety on the road, ensuring that all safety systems operate as intended under real-world driving conditions.
How To Maintain Windshield And Sensor Health For ADAS Longevity
Maintaining your windshield and the sensors behind it is crucial for ensuring the long-term reliability and accuracy of your vehicle’s ADAS systems. Sensors embedded in or mounted behind the windshield are responsible for vital safety features such as automatic emergency braking, lane departure alerts, and pedestrian detection. If you're wondering how to maintain windshield and sensor health for ADAS, start by regularly cleaning both the inside and outside of your windshield with a non-ammonia glass cleaner to avoid haze or optical distortion. Keep the area around sensors and cameras clear of smudges, dirt, or stickers, as these can interfere with readings and camera visibility. Inspect the windshield regularly for chips or cracks, especially in the upper center region where many sensors are housed. Promptly repair even small chips, as they can spread and distort sensor readings. In colder climates, avoid using hot water to defrost the windshield, as this can cause thermal shock and crack the glass. When replacing windshield wipers, choose models compatible with ADAS-equipped vehicles to prevent accidental sensor contact or obstruction. Schedule periodic system diagnostics at certified service centers to ensure sensors remain calibrated and software is up to date. If your vehicle undergoes any collision, suspension work, or tire changes, request an ADAS calibration check as alignment shifts can affect sensor accuracy. With proactive maintenance, vehicle owners can protect the function of their safety systems, extend the lifespan of critical components, and drive confidently knowing that their ADAS features are operating at peak performance.

