Tips for Removing Hard Water Stains, Window Replacement, and Auto Glass Maintenance
Tips for Removing Hard Water Stains, Window Replacement, and Auto Glass Maintenance
Tips for Removing Hard Water Stains, Window Replacement, and Auto Glass Maintenance
Replace your windshield as soon as next day at your home, work or your preferred location.
By submitting this form you are agreeing to receive SMS and phone call updates on your windshield replacement and at anytime can opt out by replying "STOP".
Replace your windshield as soon as next day at your home, work or your preferred location.
By submitting this form you are agreeing to receive SMS and phone call updates on your windshield replacement and at anytime can opt out by replying "STOP".
By submitting this form you are agreeing to receive SMS and phone call updates on your windshield replacement and at anytime can opt out by replying "STOP".
By submitting this form you are agreeing to receive SMS and phone call updates on your windshield replacement and at anytime can opt out by replying "STOP".
How can you get rid of water spots on car windows effectively?
Water spots on car windows can be a persistent problem, especially when left untreated. These marks occur when hard water containing minerals like calcium and magnesium evaporates and leaves a residue behind. Over time, they can etch into the surface of the glass, making them much harder to remove. If you're wondering how to get rid of water spots on car windows effectively, start with a simple vinegar solution. Mix equal parts distilled white vinegar and water in a spray bottle and apply it to the affected area. Allow the solution to sit for a few minutes to break down the mineral deposits, then gently wipe it clean with a microfiber towel. For tougher stains, you may need to use a clay bar or a commercial water spot remover specifically designed for automotive use. After cleaning, always rinse the glass thoroughly and dry it using a clean, lint-free cloth to prevent new spots from forming. Consistent maintenance is key—regular washing, parking away from sprinklers, and applying a glass sealant can all help keep water spots at bay. In some cases, applying a ceramic coating to your windows can make a huge difference in preventing mineral adhesion, especially in areas with consistently hard water.
What is the best way to remove hard water stains from windshields?
Hard water stains on windshields not only look unsightly but also reduce visibility, especially when driving into sunlight or at night. If you're trying to remove hard water stains from windshield glass, start by thoroughly cleaning the surface with a gentle automotive glass cleaner to remove loose dirt. Then, apply a 50/50 vinegar and water solution and let it sit on the glass for up to 10 minutes. Use a non-abrasive pad or microfiber towel to gently scrub the area. For more persistent stains, a commercial hard water stain remover or a detailing clay bar may be required to lift the minerals out of the tiny pores in the glass. Another option is to polish the windshield with a cerium oxide compound using a buffer pad for deep-seated stains. Once the glass is clean, apply a hydrophobic glass treatment like Rain-X to create a barrier that repels water and reduces the chances of future mineral buildup. Repeat this process every couple of months, especially if you live in an area with hard water or frequent rain exposure. Keeping your windshield dry after washing can also help eliminate recurring spots.
How can you remove water spots from glass effectively?
Water spots on any auto glass surface—including side windows, mirrors, and rear windshields—can form due to rainfall, sprinkler systems, or even improperly dried car washes. If you’re looking to remove water spots from glass effectively, begin by washing the area with car shampoo and drying it thoroughly. Then apply a solution of vinegar and water, allowing it to sit and dissolve mineral residues. Stubborn spots can benefit from a commercial product that includes mild acids or surfactants tailored for automotive glass. Always use a soft microfiber cloth or a dedicated glass pad to avoid scratching the surface. If your car’s glass has a protective tint or UV coating, make sure any cleaner you use is safe for that type of surface. Once the spots are gone, consider applying a ceramic coating or a water-repellent treatment to reduce future buildup. Parking indoors or using a windshield sunshade can also protect your glass from repeat exposure to sprinklers and weather that promote mineral spotting. Frequent glass inspections help catch early damage and protect against corrosion caused by acidic mineral buildup.
How should you replace a windshield with hail damage?
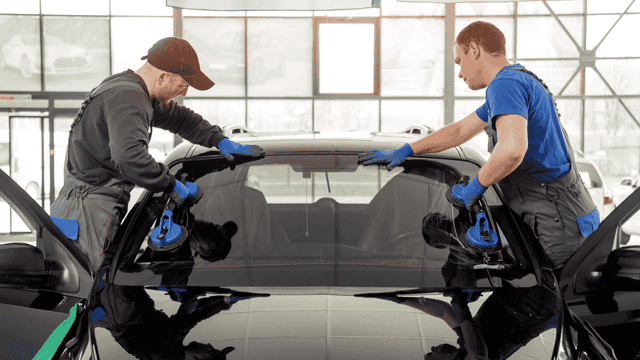
Replacing a windshield with hail damage requires a methodical approach to ensure both safety and functionality are restored. First, inspect the damage to determine whether it’s isolated to the windshield or also affects ADAS (advanced driver assistance systems), which rely on cameras often mounted to the glass. Begin the replacement process by removing any trim or weather stripping surrounding the windshield. Next, a technician will carefully cut away the urethane adhesive that holds the glass in place and remove the damaged panel. The frame must be cleaned of old adhesive and debris, and corrosion must be treated before the new windshield is installed. Use only OEM or OEM-equivalent glass for optimal fit and performance. If your vehicle is equipped with rain sensors, lane departure cameras, or HUD (head-up display), make sure the replacement glass is compatible and includes post-installation recalibration. After placing the new windshield, proper curing time must be observed to allow the urethane to set, ensuring a watertight seal and crash resistance. Skipping steps or using cheap materials can lead to leaks, ADAS malfunctions, and reduced safety in a collision. In hail-prone regions, consider using protective windshield covers when parked outdoors.
How should you replace a windshield with hail damage?
Replacing a windshield with hail damage requires a methodical approach to ensure both safety and functionality are restored. First, inspect the damage to determine whether it’s isolated to the windshield or also affects ADAS (advanced driver assistance systems), which rely on cameras often mounted to the glass. Begin the replacement process by removing any trim or weather stripping surrounding the windshield. Next, a technician will carefully cut away the urethane adhesive that holds the glass in place and remove the damaged panel. The frame must be cleaned of old adhesive and debris, and corrosion must be treated before the new windshield is installed. Use only OEM or OEM-equivalent glass for optimal fit and performance. If your vehicle is equipped with rain sensors, lane departure cameras, or HUD (head-up display), make sure the replacement glass is compatible and includes post-installation recalibration. After placing the new windshield, proper curing time must be observed to allow the urethane to set, ensuring a watertight seal and crash resistance. Skipping steps or using cheap materials can lead to leaks, ADAS malfunctions, and reduced safety in a collision. In hail-prone regions, consider using protective windshield covers when parked outdoors.
What are the best winter wiper blades to use for your car?
Choosing the best winter wiper blades can make a significant difference in visibility and driving safety during the colder months. Winter blades are specifically designed to handle snow, ice, and freezing rain. They feature a rugged rubber casing around the blade structure, preventing snow and ice from clogging the joints and reducing flexibility. Brands like Bosch ICON, Rain-X Latitude, and Michelin Stealth Ultra are among the top-rated for winter conditions. These blades use beam-style technology that applies even pressure across the windshield, ensuring better contact and wipe quality even in sub-zero temperatures. Pairing your winter blades with a windshield washer fluid that includes antifreeze agents will keep your windshield clear even during sleet or freezing rain. Replace your blades every 6–12 months, and inspect them after snowstorms or ice scraping to ensure the rubber hasn’t torn or stiffened. In extreme climates, lifting your wiper arms when parked outside can prevent them from freezing to the windshield. Heated wiper blades are another premium option, especially for vehicles in mountainous or northern climates, offering a completely ice-free experience during harsh winters.
How can you fix a cracked windshield with a glass repair kit?
Fixing a cracked windshield using a glass repair kit is a viable solution for small chips and short cracks—typically under six inches. Most kits include a resin formula, a bridge applicator, curing strips, and a razor blade. Begin by cleaning the damaged area with glass cleaner and drying it thoroughly. Position the bridge over the crack, ensuring the resin chamber aligns with the damage. Inject the resin and allow it to fill the crack, following the instructions to remove air bubbles. Cover the area with the provided curing strip and expose it to UV light or direct sunlight to harden the resin. Once cured, use the razor blade to scrape off any excess and polish the surface with a microfiber towel. The repair will restore some strength and visibility to the windshield, though it may still leave a faint mark. For cracks in the driver’s direct line of sight or near the edge of the windshield, always consult a professional to determine if full replacement is necessary for safety. Repairs completed promptly can prevent the crack from spreading across the entire windshield and reduce your long-term costs.
How can you remove tint from a car window?
Removing tint from a car window is a meticulous process that requires patience and the right tools. First, soften the adhesive by heating the tint with a hairdryer or heat gun, starting at a corner. Slowly peel the film away from the glass while applying more heat to stubborn areas. Once the film is removed, you’ll likely find a sticky layer of adhesive remaining. Spray this with a mix of ammonia and water or a commercial adhesive remover and let it soak for several minutes. Use a plastic razor blade to gently scrape the softened glue, being careful not to scratch the glass or damage rear defroster lines. After all the residue is cleared, clean the window with automotive glass cleaner. Avoid using harsh chemicals like acetone or blades that could scratch tinted or coated windows. Replacing old, bubbling, or faded tint can significantly improve your vehicle’s appearance, comfort, and resale value while ensuring visibility meets legal standards in your state. If reapplying tint, wait until the surface is completely free of residue to ensure a flawless finish.
How do you replace auto glass in Gilbert, AZ?
Replacing auto glass in Gilbert, AZ, or any hot-climate area requires careful consideration of heat and UV exposure. Start by choosing a certified shop that understands the challenges of high-temperature adhesive curing and thermal expansion. Quality auto glass replacement in Gilbert involves removing the damaged glass—whether it’s a windshield, rear window, or door panel—and thoroughly cleaning the frame. A technician will then apply high-performance urethane adhesive and install the new panel. UV-protective and infrared-blocking glass options are highly recommended in Arizona to combat extreme sunlight and cabin overheating. If your vehicle is equipped with advanced driver assistance systems (ADAS), ensure the shop includes recalibration services. Many providers in Gilbert offer mobile services that come to your location, making it easier to stay on top of urgent repairs. Always verify that the replacement glass is DOT-certified and request a warranty on labor and materials. Local providers may also help with insurance claims, especially since windshield damage is common due to gravel roads and frequent temperature shifts in the region.
What should you do if your window is off track?
When a window is off track, it may not roll up or down properly, which can expose your car’s interior to weather and create security concerns. To fix a window that’s off track, remove the interior door panel using a trim removal tool and a screwdriver. Once the panel is off, inspect the window regulator and track for broken parts, debris, or misalignment. If the regulator is functional but the glass has slipped out of its guide, carefully reposition it and tighten any loose mounting hardware. Lubricate the tracks using silicone spray to ensure smooth motion. If the regulator or motor is damaged, replace them with OEM or compatible aftermarket parts. After the repair, test the window’s movement before reinstalling the door panel. If you're not confident in performing this repair, visit a professional auto glass or body shop to ensure everything is realigned and sealed correctly to prevent leaks and future issues. Ignoring the issue can cause long-term regulator damage or result in your window becoming completely non-functional during critical moments.
How to remove scratches from auto glass and prevent further damage
Scratches on auto glass can range from superficial marks to deeper grooves that impair visibility and weaken structural integrity. To remove scratches from your car windows or windshield, begin by determining the depth of the scratch—light scratches can often be polished out using a cerium oxide-based glass polish or a commercial scratch repair kit. Clean the glass thoroughly with a non-abrasive cleaner and dry it with a microfiber towel. Apply the polish to a buffing pad or cloth and work it into the scratch in circular motions with consistent, light pressure. Repeat as needed until the scratch fades or disappears. For deeper damage, professional glass resurfacing may be required. In some cases, if the scratch is too deep or located in a structurally sensitive area, full replacement may be the safest solution. To prevent future scratches, always use soft towels and ammonia-free cleaners, avoid running wipers on dry or dirty glass, and regularly clean both your blades and windshield. Applying a glass sealant also helps reduce friction and minimize surface damage over time. Prevention, paired with timely repair, preserves the optical clarity and integrity of your vehicle’s glass.

